Guide 3 of 21
Pick a design and add your photo
Browse the design wall by occasion, collection and tone, then put your own photo or art on the invite.
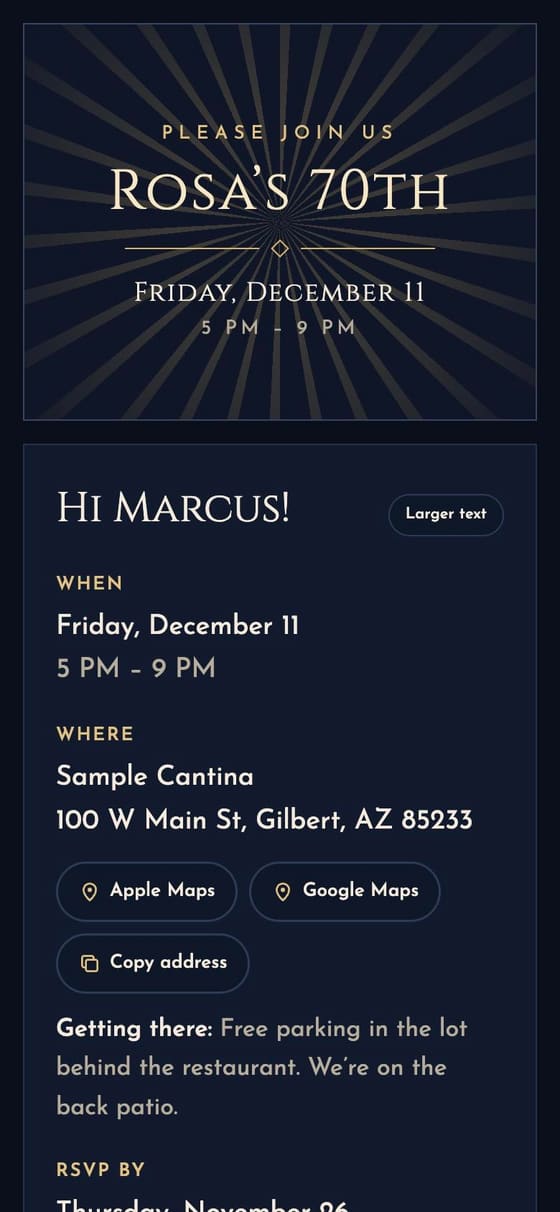
Every design is a real invite: it opens like an envelope, greets each household by name and takes their RSVP. Some frame a photo of the guest of honor, and Our own art builds the invite around a picture you upload.
Browse the design wall
The design wall shows them all. Narrow it by occasion or collection (Birthdays, Weddings, Fall, Christmas and more) and by tone, Funny or Formal. Tap a design to open a live sample invite. When you’re signed in, Use this design starts a party with it.
Pick one while you plan
At the planner’s Pick a look step, the designs that suit your occasion come first. Chips narrow the list: Suggested, then each collection, then all of them.
To change it later, open Edit details on the party page and pick another under Design. Guests’ links stay the same.
Painted wedding styles
Eight wedding styles come as a whole painted set: Desert Evening, Garden Rose, Seaside, Mountain Pines, Gilded Deco, Hacienda Tile, Citrus Grove and Wildflower Meadow. Pick one and the invite, its envelope, your wedding website and every section on them (the menu, where to stay, your story, the registry) share the same hand-painted look. Each comes in three colors; a style’s page shows the other two under In other colors.
Pick a layout
Designs from the library come in six layouts. Every layout has the same parts (the card, the RSVP, your details and plan, your sections, who’s coming, questions); only the arrangement changes:
- Side by side: the card beside the RSVP, then each part across the page.
- Card on top: the card first, like an invitation on the table, then each part on a card of its own.
- Pinned: the card stays put on one side while the invite scrolls beside it.
- Full bleed: the art fills half the screen, edge to edge.
- Backdrop: a soft copy of the art behind the top, with the card in front.
- Classic: the card beside one sheet with everything on it.
Each design starts on the layout that suits it, so the library doesn’t all look alike. To pick another, open Edit details and choose under Layout, or ask the party helper (“try another layout”). On a phone every layout stacks: the card, then the RSVP, then the rest.
The designs made by hand for one party keep their own page.
Add your photo
Designs that frame a photo say so in their description, like “their photo on a trading card.”
- Open Edit details.
- Under Invite art or photo, choose a picture from your phone or computer. It’s resized before it uploads, so big phone photos are fine.
- Tap Save changes.
If the design you picked doesn’t frame a photo, adding a picture switches the party to Our own art.
Our own art
Your picture fills the invite beside the details, like a printed card; a portrait picture works best. Uploading it picks an Accent color (for the buttons, labels and the envelope’s seal) and a Dark or Light page to match. Change either one before you save. To take the picture off, tick Remove the current art.
Photos on the invite, with any design
To keep the design and show your own photos too, use Photos on the invite in Edit details (once the party is saved). Tap Add photos and choose up to six; each saves as it uploads, so there’s nothing else to save.
- One shows large under the details, two sit side by side (the guest of honor then and now), and more make a neat grid.
- Add a caption under any photo; it saves when you leave the box.
- The arrows change the order, and Remove takes one off.
Guests tap a photo to see it large, with its caption, and swipe to the next.
Choose how it opens
Every invite opens with a moment before the card. Match the design is an envelope in your design’s colors, with the guest’s name, a stamp and a postmark. To pick another, find How it opens in the planner’s look step or in Edit details: envelopes, sealed letters, gift boxes, tickets, scratch-offs, curtains, greeting cards, balloons, cakes, doors, a scroll and an instant photo, each shown on your own invite. Tap Play under one to watch it; the invite preview beside the form switches to the one you pick. See them all on the openings page.
Add music and an effect
Under How it opens are three more choices, all off unless you pick them.
- Music when it opens starts when a guest taps to open the invite: Happy Birthday on a music box, Canon in D, Jingle Bells, an 8-bit tune and more. Tap Play to hear one. Guests get a button in the corner to turn it off, and their phone remembers.
- An effect after it opens drifts over the invite for a few seconds once it’s open: confetti in your design’s colors, sparkles, petals, hearts, bubbles, snow, leaves, lanterns or fireflies. Tap Try it to see one on the page. Guests whose phones are set to reduce motion don’t see it.
- Let the picture move gives the design’s picture a slow drift and zoom once it’s open, like a film, while the words stay still. It’s for designs with a picture, and it’s off for phones set to reduce motion.
See what guests see
Preview invite on the party page shows the invite with your details and a sample household’s name; Replay intro opens the envelope again.
Each design comes with its own greeting, email subject, RSVP question and lines guests see after they RSVP. To use your own words, fill in Greeting, Invite email subject, The RSVP question and answers and After they RSVP in Edit details. Leave them blank to keep the design’s.
The RSVP question and its three buttons can match your theme: “Will you join the coven?” with “Count me in, broom and all”, “Consulting my crystal ball” and “Cursed with other plans”. Ask the party helper to “make the RSVP wording fit the theme” and it writes them for you. Write the yes so it reads right for one guest or a whole family.
Next guide Make art from your words →